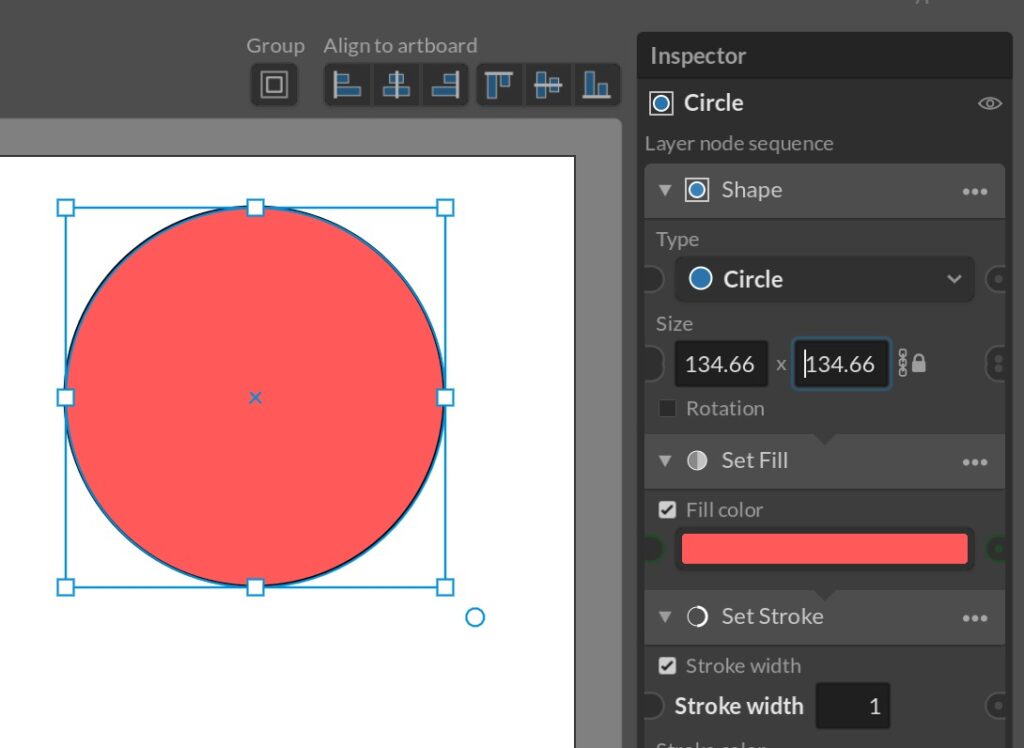
Layer nodes are a key concept in Paragraphic, and the core building block in the generative parametric design system it uses. Unlike in traditional design software each layer in Paragraphic is not just a container for graphical content that you modify. Instead each layer is a sequence of generation steps called layer nodes that generates the content of the layer each time the node parameters are changed.
The name layer nodes is chosen because under the hood this is very much like a node based system some of you may be familiar with, which also enables connecting parameters and values between these nodes. But if you are not familiar with this type of system you can consider them as layer generation steps, where the important thing to understand is that they are a sequence of steps that together generate what graphical elements the layer will output.
I’ll now go into a little more detail regarding some different types of layer nodes and how they are used:

Generator nodes
The generator nodes are always the first nodes (and sometimes the only nodes) in a layer, and they are responsible for actually generating graphics content from scratch. A simple example can be to generate a shape based on size and type parameters, or generating a new image element based on a image file data.
While this is a little more complex layer groups and instance layers also start with special generator nodes, but in these cases the generators add elements based on the group child layers or linked original parent layer.
Since the generators generate elements from nothing they don’t need any input from previous nodes, so they’re always the start of the node sequence. This also means you can only have one generator node per layer and can’t add new ones.
Change nodes
Change nodes are the most common type of layer node and to put it in simple terms they take input from the previous node in the sequence and change it in some way before outputting it. For example taking the output from a shape generator node and setting the fill color of the elements or changing them in some way.
Unlike the generator nodes you can have any number of change nodes in any order you chose on a layer, which is what makes the system so flexible. This means you can modify any properties of the generated elements in any order and always be able to access and modify any previous step in the sequence.

Repeater nodes
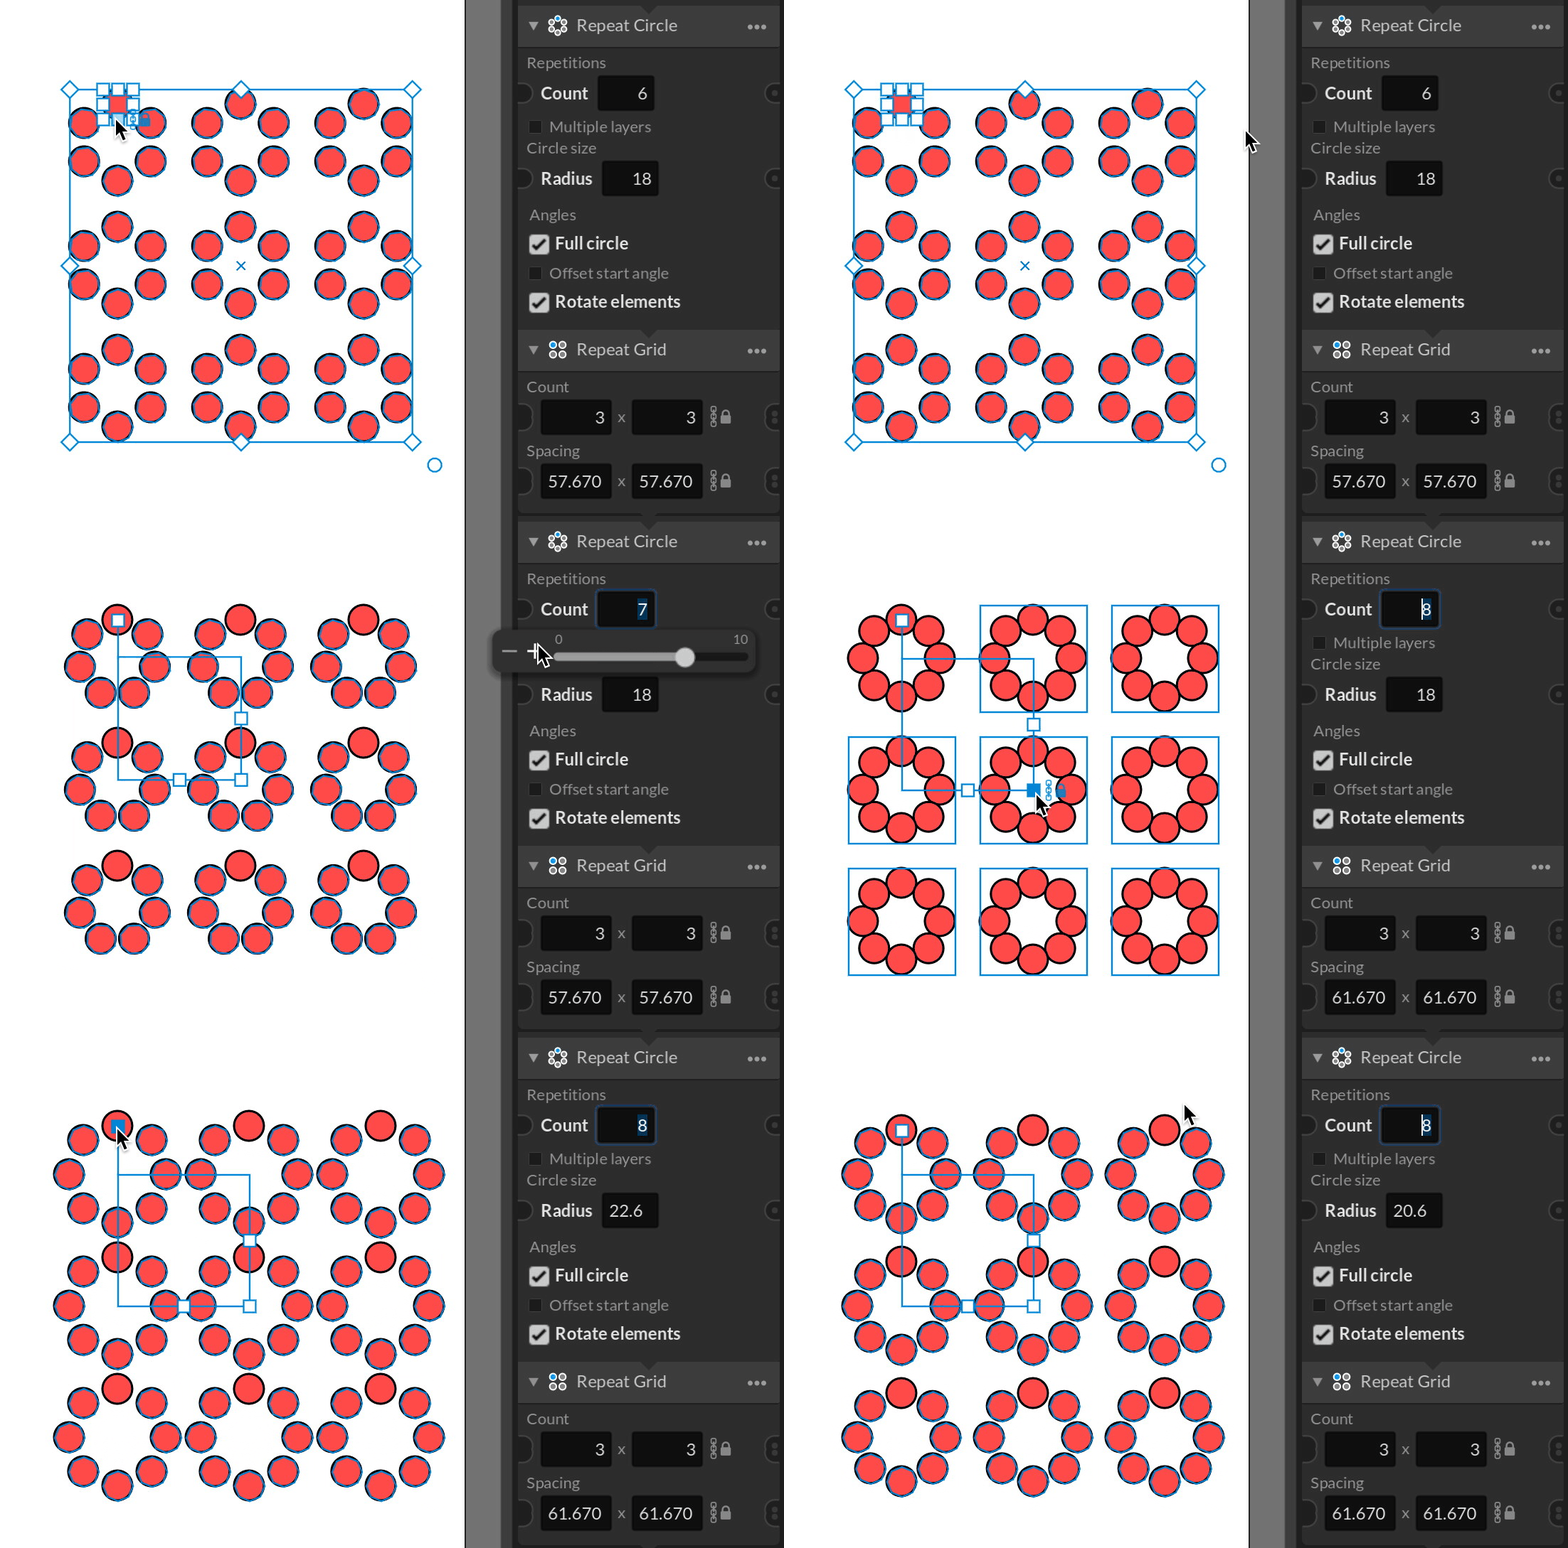
Repeater nodes are nodes that repeat the input in some way, so that the output becomes a group of multiple copies of the input. For example you can repeat something applying a transformation for each copy, repeat elements in a grid, circle or to cover an area.
This is useful since one of the main benefits of parametric design systems is that it makes it easy to work with a lot of elements and patterns at once, instead of manually needing to change them. And these repeater nodes enable you to easily generate sets and patterns of elements you can then apply further modifications to.
Just like the change nodes you can also add any number or repeater nodes to the same layer, so it’s easy to make multiple-layer repetitions like first making a ring of squares and then repeating this ring in a grid. And still be able to modify the count and offsets of both repeater patterns.

Group nodes
The last type of layer nodes I’ll cover here is Group nodes. Technically these are very similar to change nodes, in that they modify input elements. However, these group nodes are nodes with functionality that makes them most useful when they are applied to a group of elements.
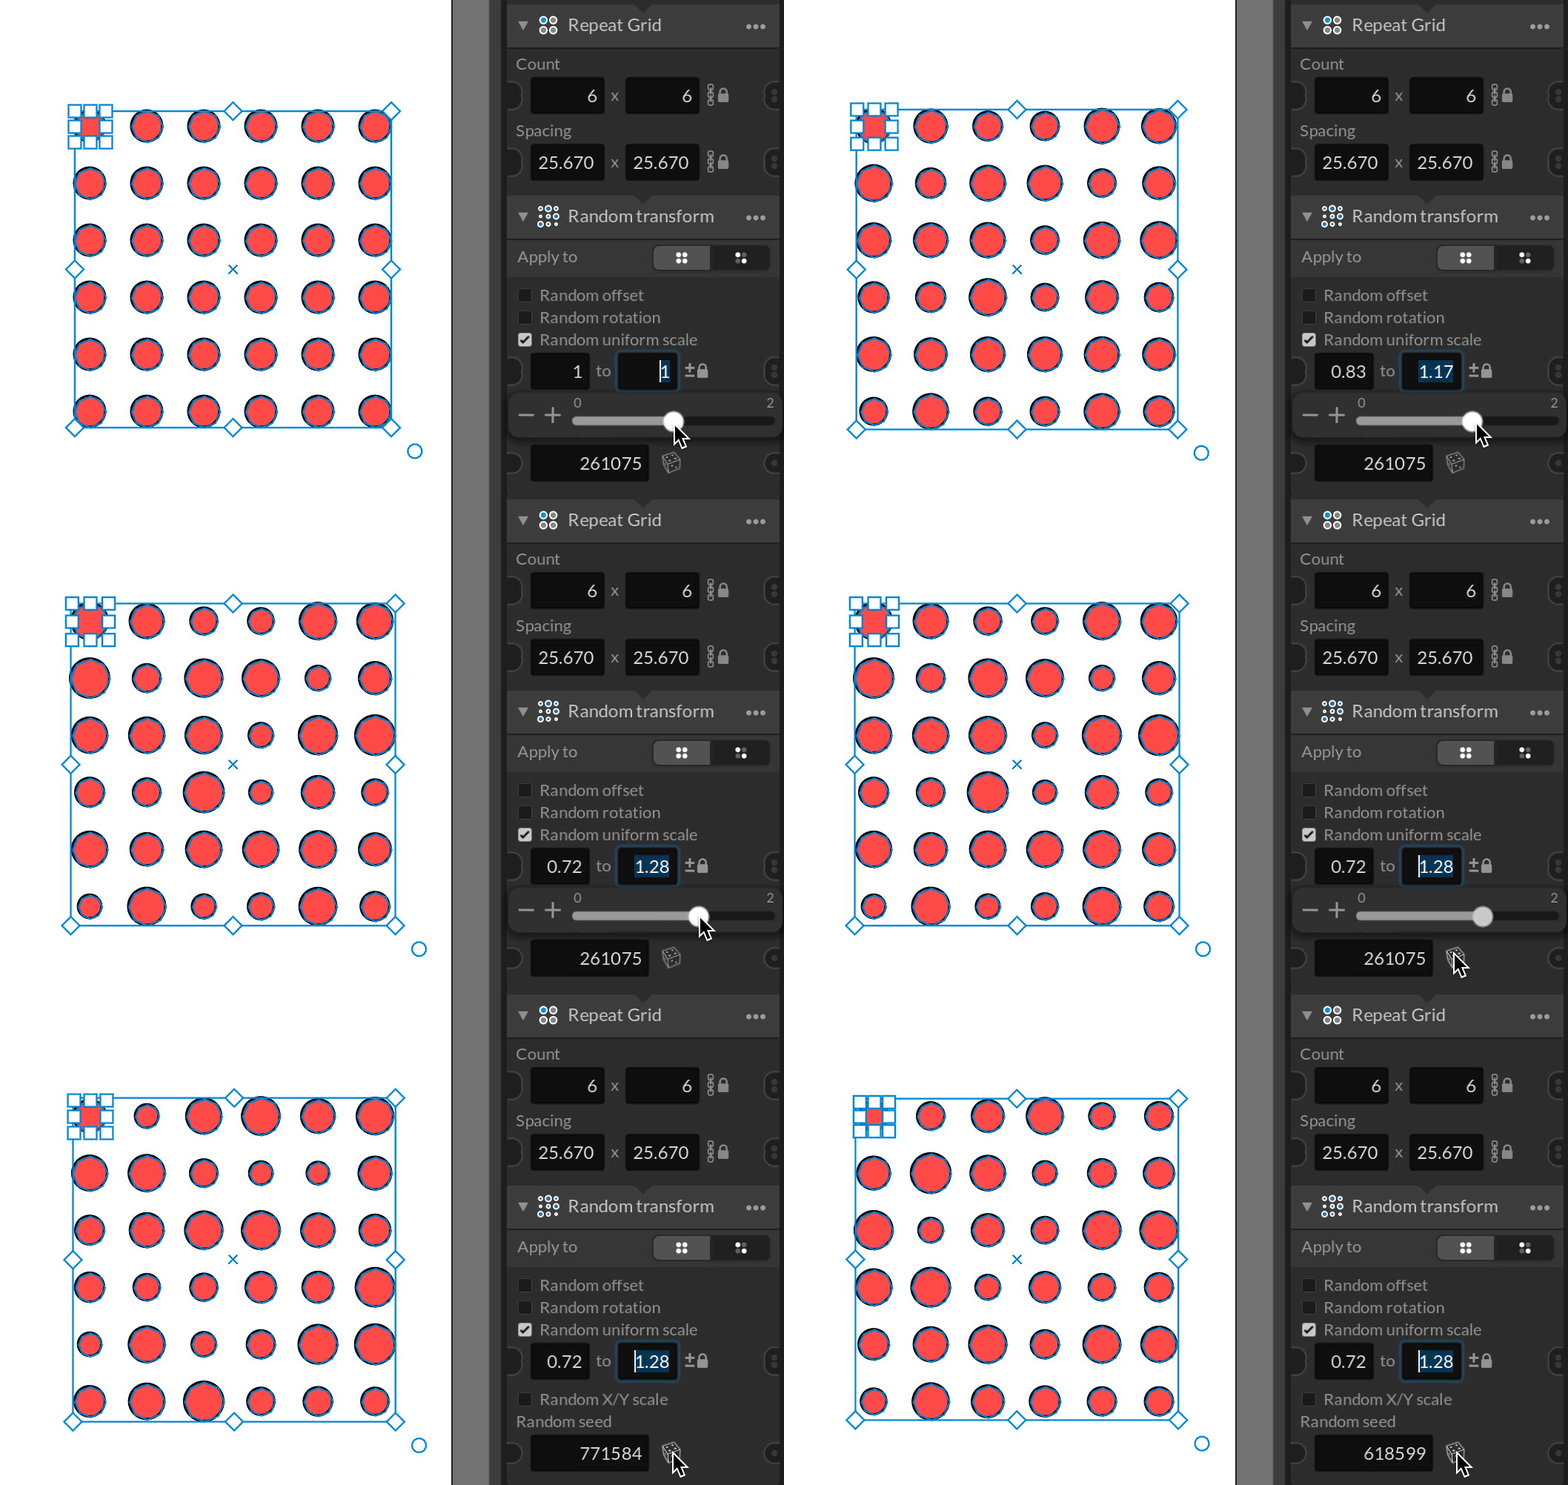
This means that typically you’ll have either a group layer or a layer where you’ve previously added a repeater node so that it outputs a group of elements. The group nodes will then allow you to apply modifications to each of the individual elements in these groups, or a selection (like every other element). For example applying a random offset or rotation to each element within a range you set, or a transformation based on position to make a gradient.
If the input is a group all change nodes will actually offer this same functionality, allowing you to select to apply the change they perform to the entire group, each individual element or just a selection of the elements in the group.
Additional improvements
The roadmap step I’ve called Prototype 2 is now complete, and it’s time for another round of testing with some selected testers to see how the interface and basic concepts hold up before moving on to more complex features.
UI/UX
- Redesigned toolbar with heading labels and selection description to the left instead.
- Improved selection description with element count and button to open the layer elements structure window.
Tools
- Added distribute and pack buttons to the toolbar. This means there’s now a full set of tools for aligning, distributing and packing layers on the art board.
